

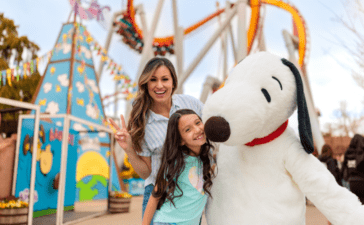
Counting down the minutes until your next visit to Pixar Pier at Disney California Adventure Park? I’ve got a no sew DIY perfect for wearing to the park! Make your own DIY Pixar Headband using just a few craft supplies and even less time. Wearing Pixar-inspired accessories is just one way to celebrate the fun of the Disneyland Resort.
This post may contain affiliate links. Please see my disclosure policy for more information.
I dare you to watch a Disney Pixar movie without crying. I can’t even make it through the animated shorts without feeling all the feels. Between the masterful storytelling and relatable characters, I know a box of tissue is needed alongside my popcorn. But that’s what Joy figures out in Inside Out — that our memories and experiences are filled with mixed emotions. Spoiler, sorry.
DIY Pixar Headband
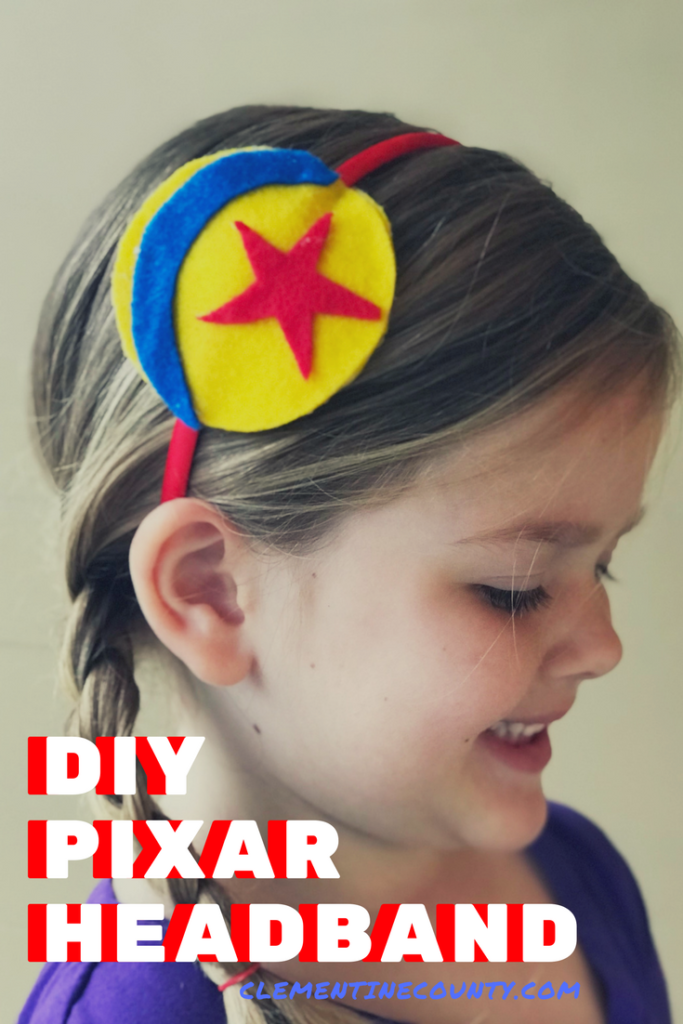
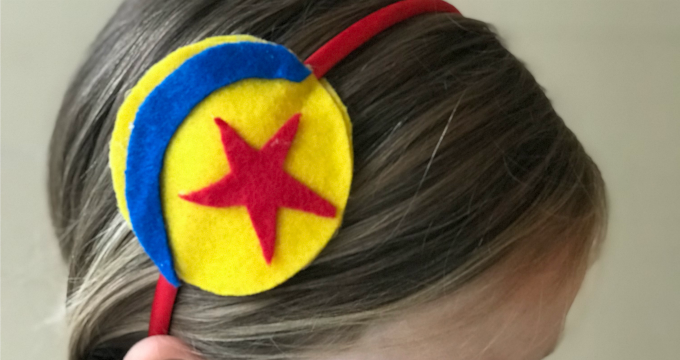
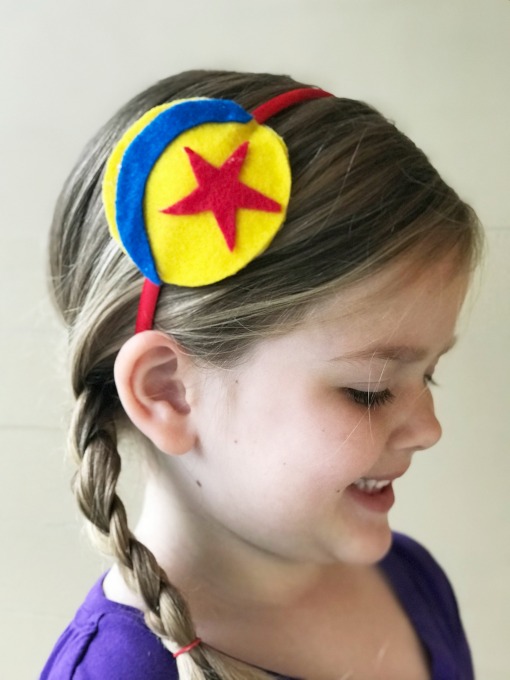
To ensure my family rolls over to the Disneyland Resort in themed attire, I made my girls a Pixar ball inspired headband. You can make your own with just a few simple supplies and a few minutes of your time. Bonus points for crafting while watching a Disney Pixar film or daydreaming about the upcoming Incredibles 2.
Supplies:
- Felt in red, yellow, and blue
- Red heaband
- Glue Gun
- Stuffing
Gathering supplies when you’re inspired can often mean running from one store to the next. I make life easier by adding it all to my Amazon cart.
How to Make a Pixar Headband
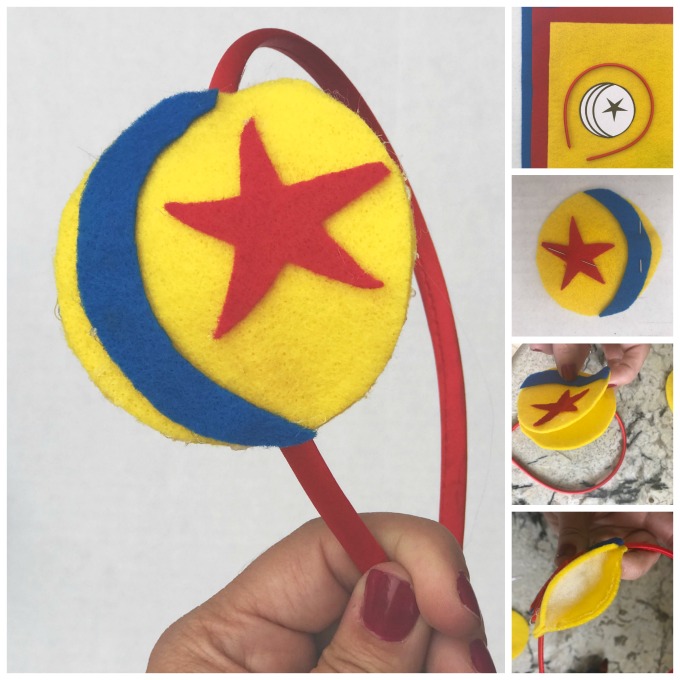
To get an idea of how I wanted the ball to look, I cut out circles on scrap paper. Use a drinking glass for an easy template. The blue is made from trimming the sides of the circle. Add a star and you’re set!
Begin by turning on your glue gun to warm the glue. While that’s heating, cut two yellow circles out of felt. One will serve as the backing for the ball design on the headband. Cut out the blue curved line of the ball & the red star.
I pinned my design together temporarily to make sure everything was fitting correctly. Carefully glue the star and blue line to the front of your headband design.
Start gluing the two yellow circles together. I started with approximately 1/4 of the circles adhered together.
Position the headband inside of the two circles and glue the back circle to the headband directly. This will keep it secure.
Add stuffing to give the headband a more rounded ball-like fell. You won’t need much.
Finish gluing the two yellow circles together. Ta-da!
Wondering where to wear your DIY Pixar Headband?
- Throw a Disney movie marathon. Grab your own Disney movie marathon printables to prepare!
- Headed to the Disneyland Resort? Check out discounted Disneyland ticket packages.
- Anywhere!
Make sure to tag me on Instagram if you make a Disney DIY so I can share! Happy crafting!

What a cute idea! I love Disneyland and of course Pixar. Pixar Fest sounds so exciting!
Thanks for checking it out, Ashley! We are anxiously awaiting the fun with all of our favorite Pixar characters.
Oooh! The alien macaroon is adorable! It’s almost too cute to eat but I could probably pull if off if I had to. I wish we were closer to the park, NY is a long drive haha
If I don’t eat them all, maybe I could send you some macaroons!
Looks like it is easy enough for even my limited talents. Thanks
You’re selling yourself short! But it really is a quick project.
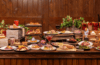
Your girl is a cutie and that headband is so pretty on her. Those Alien Macaroons are so cute I bet they are tasty too. And that cake how colorful. I bet my grandson would love it!
That Mickey Mouse sure does whip up some amazing treats!
That is such a great idea and too cute! I love how Pixar cake matches the headband!
That cake looks incredible, doesn’t it?
Very cute!! I would have never thought about doing something like this but it sounds pretty easy. I know both of my girls would love it.
It’s super easy! If you like to sew, you can certainly make it that way also.
Oh, mu want to try and make this for my nieces. I am totally DIY challenged but I am trying it anyway. Too cute. Plus hello Pixar can anyone else holler toy Story Land.
Oh, Toy Story Land! I can’t wait to see that too! I’m going to have to travel the country exploring all things Pixar!
that is the cutest headband that I have ever seen, very creative and cute for the kiddos to make as well and play dress up with. The Pixar cakes look really cool as well.
Thank you so much! It’ll keep the hair out of my face as a dive face first into that cake!